
Let’s unravel the query, ‘I’m eager to venture into papercutting, but what tools do I need?’ right here in this article.
In my forties, I took my first steps into the world of papercutting armed with just ‘paper, a cutter, and (a makeshift cutting mat of) newspaper.
However, I wouldn’t recommend substituting newspaper for an actual cutting mat – it’s not the most efficient option.
So, for those who are entirely new to papercutting and are keen to try it out on a whim, I’ll personally suggest what I consider to be the (almost) bare essentials.
For anyone looking to tiptoe into papercutting as a beginner, I hope this can be a nifty starting point.
Let the papercutting journey begin!
Essential Tools to Begin Your Papercutting Journey

Let’s break down the tools you’ll need to kickstart your papercutting adventure. We’ll go through each one step by step.
① Cutter Knife
If your designs don’t involve extremely intricate details, a regular cutter knife will do just fine initially. I personally began my papercutting journey with this type of knife.
② Design or Art Knife
For finer details, using a design or art knife makes the cutting process significantly smoother. If you find yourself falling in love with papercutting, investing in one is highly recommended.
③ Cutting Mat
While cutting mats come in various materials and sizes, beginners can start with a less expensive mat from K-mart or BIG W in Australia. I find that a slightly larger mat than the size of your artwork is more convenient. I often cut A4-sized pieces but using an A3-sized mat provides a spacious workspace.
④ Replacement Blades (for Cutter and Design Knife)
Dull blades can lead to accidents, so having replacement blades on hand is essential. If you’re using a cutter knife, fold the blade for a fresh edge. Design knives require blade replacements. Be cautious, as new blades are incredibly sharp.
⑤ Black Paper
Beginners often find thinner paper easier to cut. However, avoid extremely thin paper like wrapping paper. Colored paper from newsagencies or craft shops(even from supermarkets’ ) is sufficient initially. As you get more comfortable, you can consider investing in specialty papercutting paper.
⑥ Patterns (Templates)
You can design your own patterns or use free templates from websites. Either way works well.
⑦ Fastening Tools for Patterns and Paper
Staplers and masking tape are commonly used tools. Once your patterns and paper are secured, you’re good to go. If you can directly print your patterns onto black paper, you won’t need this.
Embark on your papercutting journey with these essentials!
Crafting Your Papercutting Patterns – Securing Techniques

Let’s explore two common methods for securing patterns to paper.
1. Staple Fastening (photo on the left)
When the pattern and the cutting paper are the same size, it’s advisable to staple the edges in several places. This ensures a stable hold during the cutting process.
2. Masking Tape Fastening (photo on the right)
If the pattern is smaller than the cutting paper, using masking tape to secure it in several places works well. This prevents any unwanted movement during the cutting process.
Mastering the Basics: Fundamental Cutting Techniques
Now, let’s dive into the step-by-step procedure and key points for mastering basic cutting techniques.
1. Handling Intersections
When dealing with intersecting points, making a slightly larger cut ensures clean corners. For a fine and acute angle,
2. Orientation Matters
Depending on the situation, consider changing the orientation of both the paper and the pattern. Always pull the blade towards yourself for more control.
3. Progression
Begin cutting from the center of the pattern and work your way towards the outer edges. While you may start cutting from various points depending on the pattern, when in doubt, follow the approach of cutting “from the center to the outer edges.”
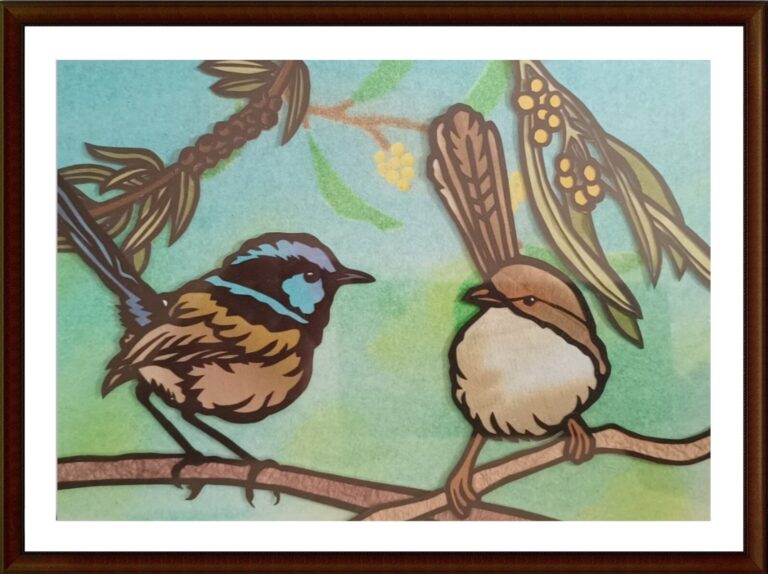
Mounting Your Papercut Artwork
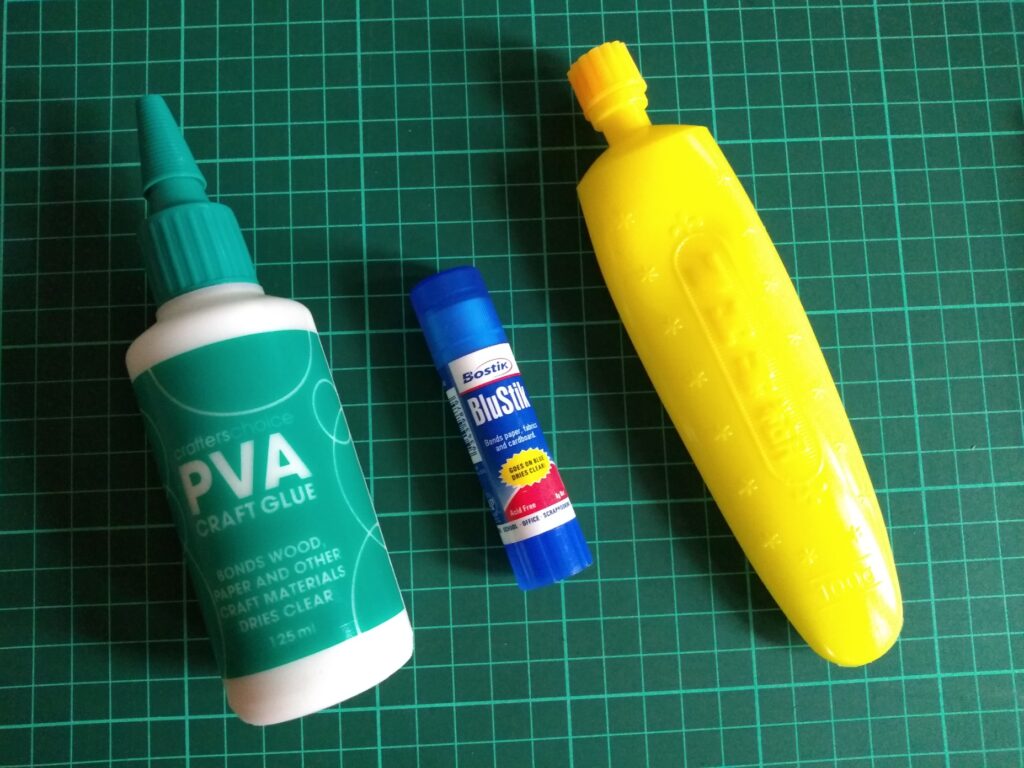
Let’s explore various methods for affixing your papercut creations. While leaving them transparent in frames is an option, I’ll introduce techniques for mounting on backing boards using the following adhesives:
1. Yamato Rice Paste Glue (photo on the right)
A reliable choice for securing your artwork. Yamato paste provides a strong hold, ensuring your piece stays in place.
2. Glue Stick (photo in the middle)
Convenient and easy to use, a glue stick offers versatility when attaching your papercut to a backing board.
3. Craft Glue (photo on the left)
Ideal for a secure bond, craft glue ensures your artwork remains firmly attached to its mounting surface.
Papercutting Tips: Avoiding Strain and Discomfort

Working with cutting tools requires careful attention to avoid injuries to your hands and fingers.
However,
These are experiences I went through when I first started papercutting.
Before picking up your cutter knife, consider massaging your fingers, engaging in hand exercises, or using a stress ball to warm up your joints.
Take regular breaks and proceed with your cutting endeavors mindfully.
Conclusion
For those venturing into papercutting as beginners, I’ve introduced essential tools, cutting techniques, and mounting methods to get you started.
With these five items, you can start papercutting right away.
Feel free to acquire replacement blades and adhesives as needed later.
Seize the moment, give it a try, and embrace the art of papercutting!
Thank you for reading until the end.
